User management
Avatar users live in Authentik, the identity provider of both self-hosted paths. There is no separate user store in Avatar.
With the deploy tool (Docker)
octopize-deploy-tool tasks create-users creates the accounts in Authentik, puts them in the right
group, and emails each user a link to set their password. Run it once the stack is up. It is safe
to re-run: existing accounts are skipped.
octopize-deploy-tool tasks create-users --app-root ./app/avatar \
  --admins alice@company.com \
  --users bob@company.com,carol@company.com
--no-email creates the accounts without sending the email. If the email fails, the account still
exists: send the link from the Authentik interface, as in step 3.
In the Authentik admin interface
Use this on Kubernetes, or when you need finer control than the command offers. Log in at
https://<your-domain>/sso/ with an account that is a superuser or has the Avatar Tenant Admin
role, for example akadmin. The workflow is:
- Create a group for the organization.
- Create the users inside that group.
- Send each user a recovery email so they set their own password.
See also the Authentik documentation on users, groups and roles.
1. Creating a group
In authentik, groups are the primary mechanism for managing permissions. Each customer company
should have its own group. The group name should match the email domain of that customer
(e.g. facebook for a user with john@facebook.com). License type is controlled via a
group-level attribute.
1.1 Navigate to the Groups page
In the left-hand sidebar, expand Directory and click Groups.
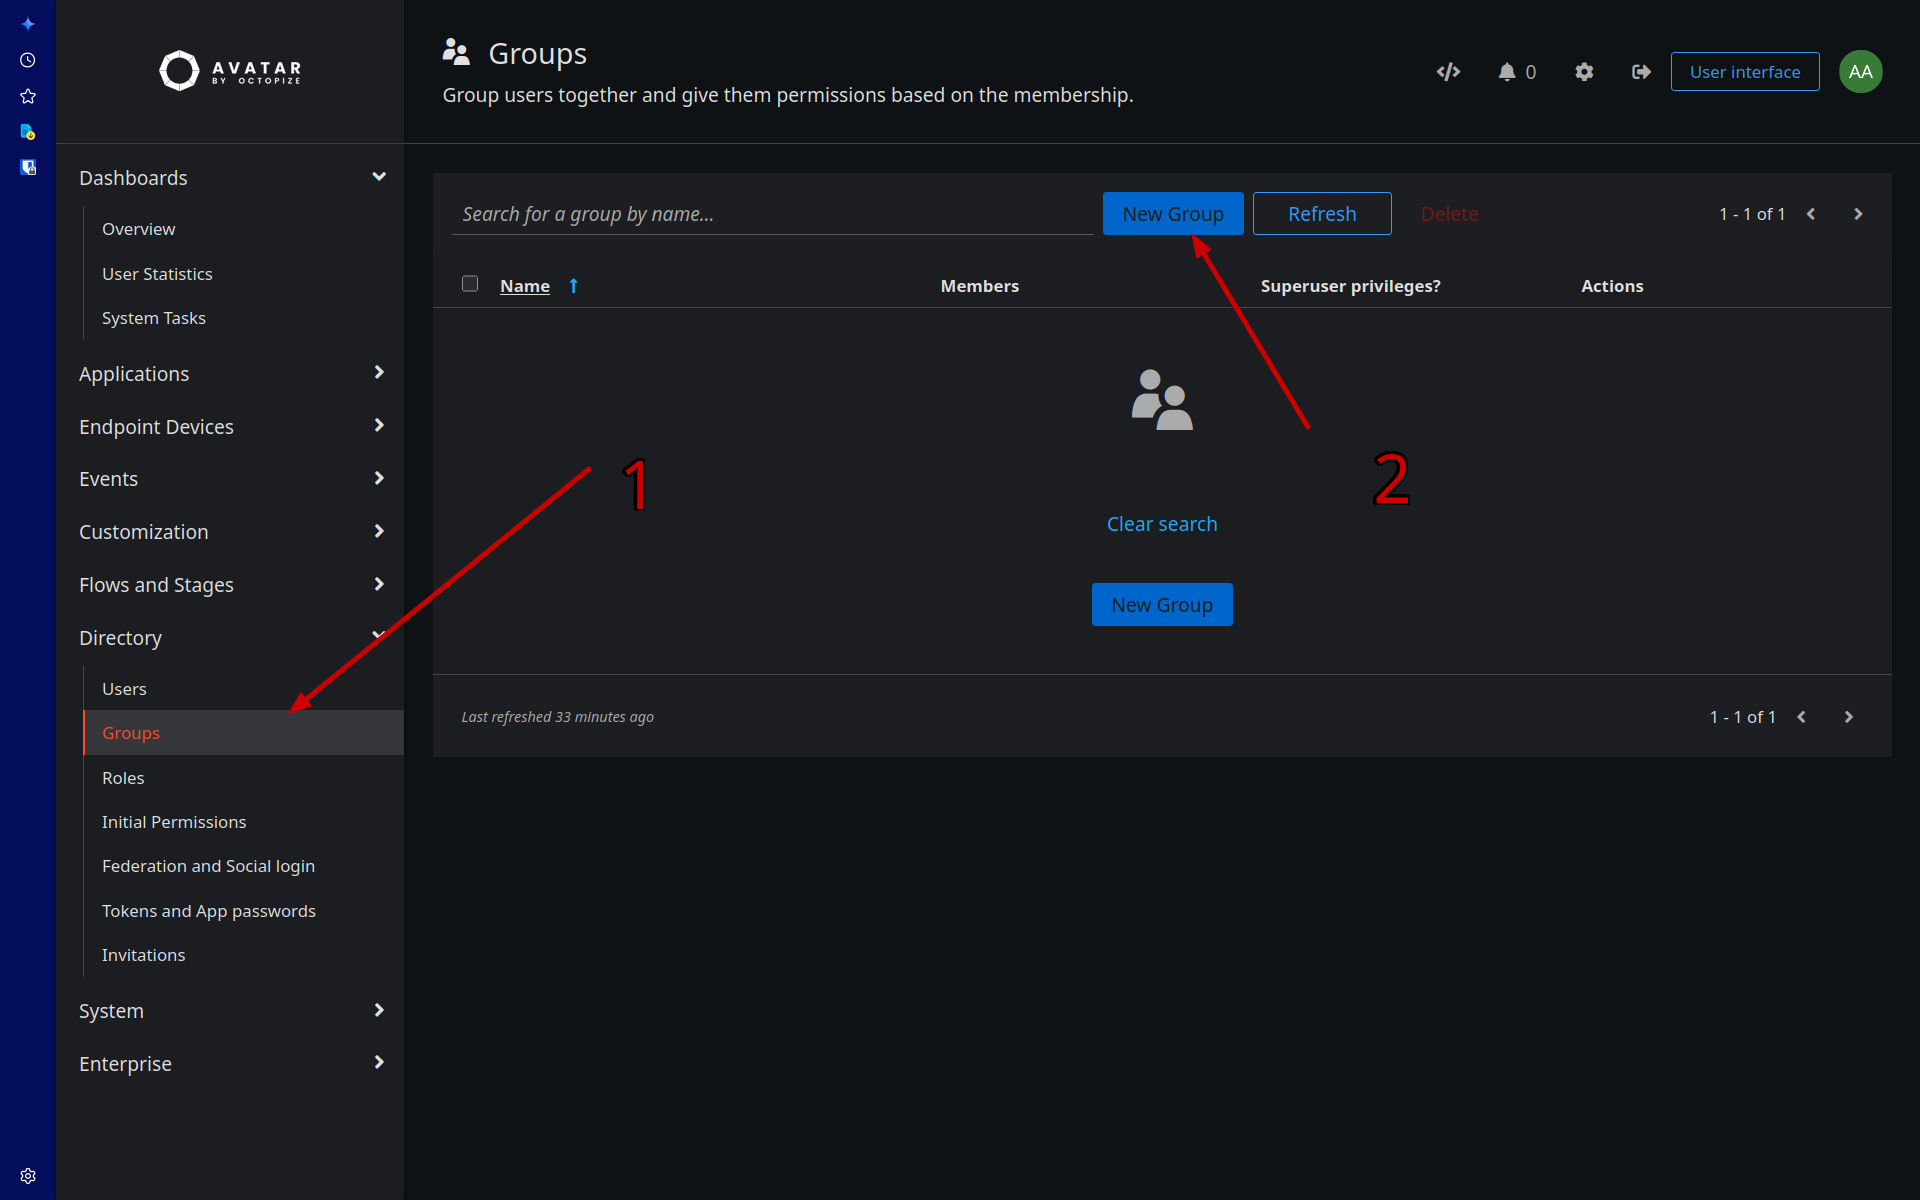
(1) Click Groups in the sidebar under Directory. (2) Click the New Group button in the top-right area of the list.
1.2 Fill in the New Group form
The New Group dialog will appear.
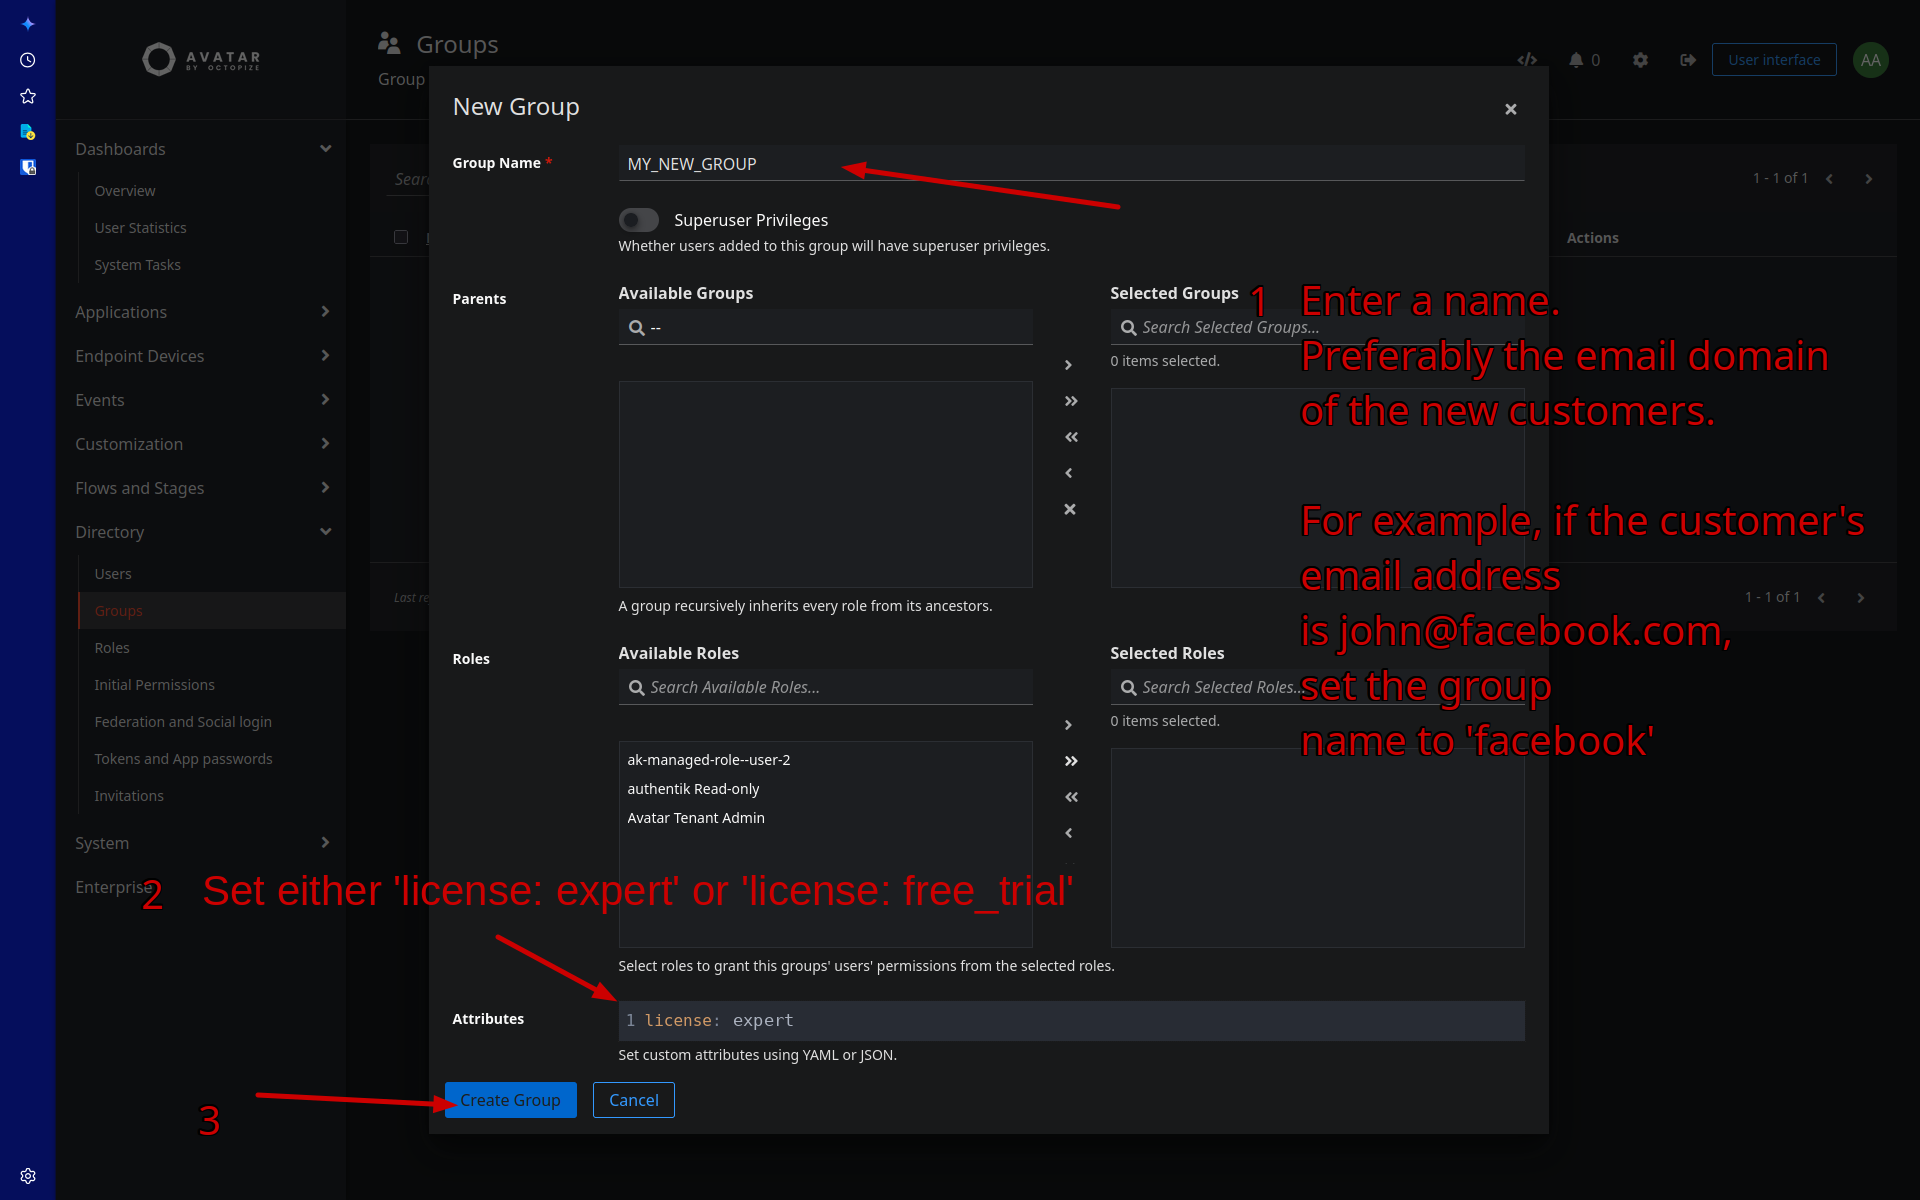
Fill in the fields as follows:
| Field | What to enter |
|---|---|
| Group Name | The customer's email domain, e.g. facebook. See the annotation in the screenshot. |
| Superuser Privileges | Leave disabled unless explicitly required. |
| Parents / Roles | Leave empty for standard customer groups. |
| Attributes | Set the license type: license: expert for paying customers, license: free_trial for trial/demo access. |
(1) Enter the group name — preferably the email domain of the new customer.
(2) In the Attributes field, enter either license: expert or license: free_trial in YAML format.
(3) Click Create Group.
Why the email domain? Using the domain as the group name makes it easy to correlate groups with customer organizations, and matches what we do with Google OAuth Login.
2. Creating users
Users are created from within the group they belong to. This ensures they are automatically associated with the correct group on creation — no need to assign group membership separately.
2.1 Open the group and go to the Users tab
After creating the group, it will appear in the Groups list. Click on the group name to open it.
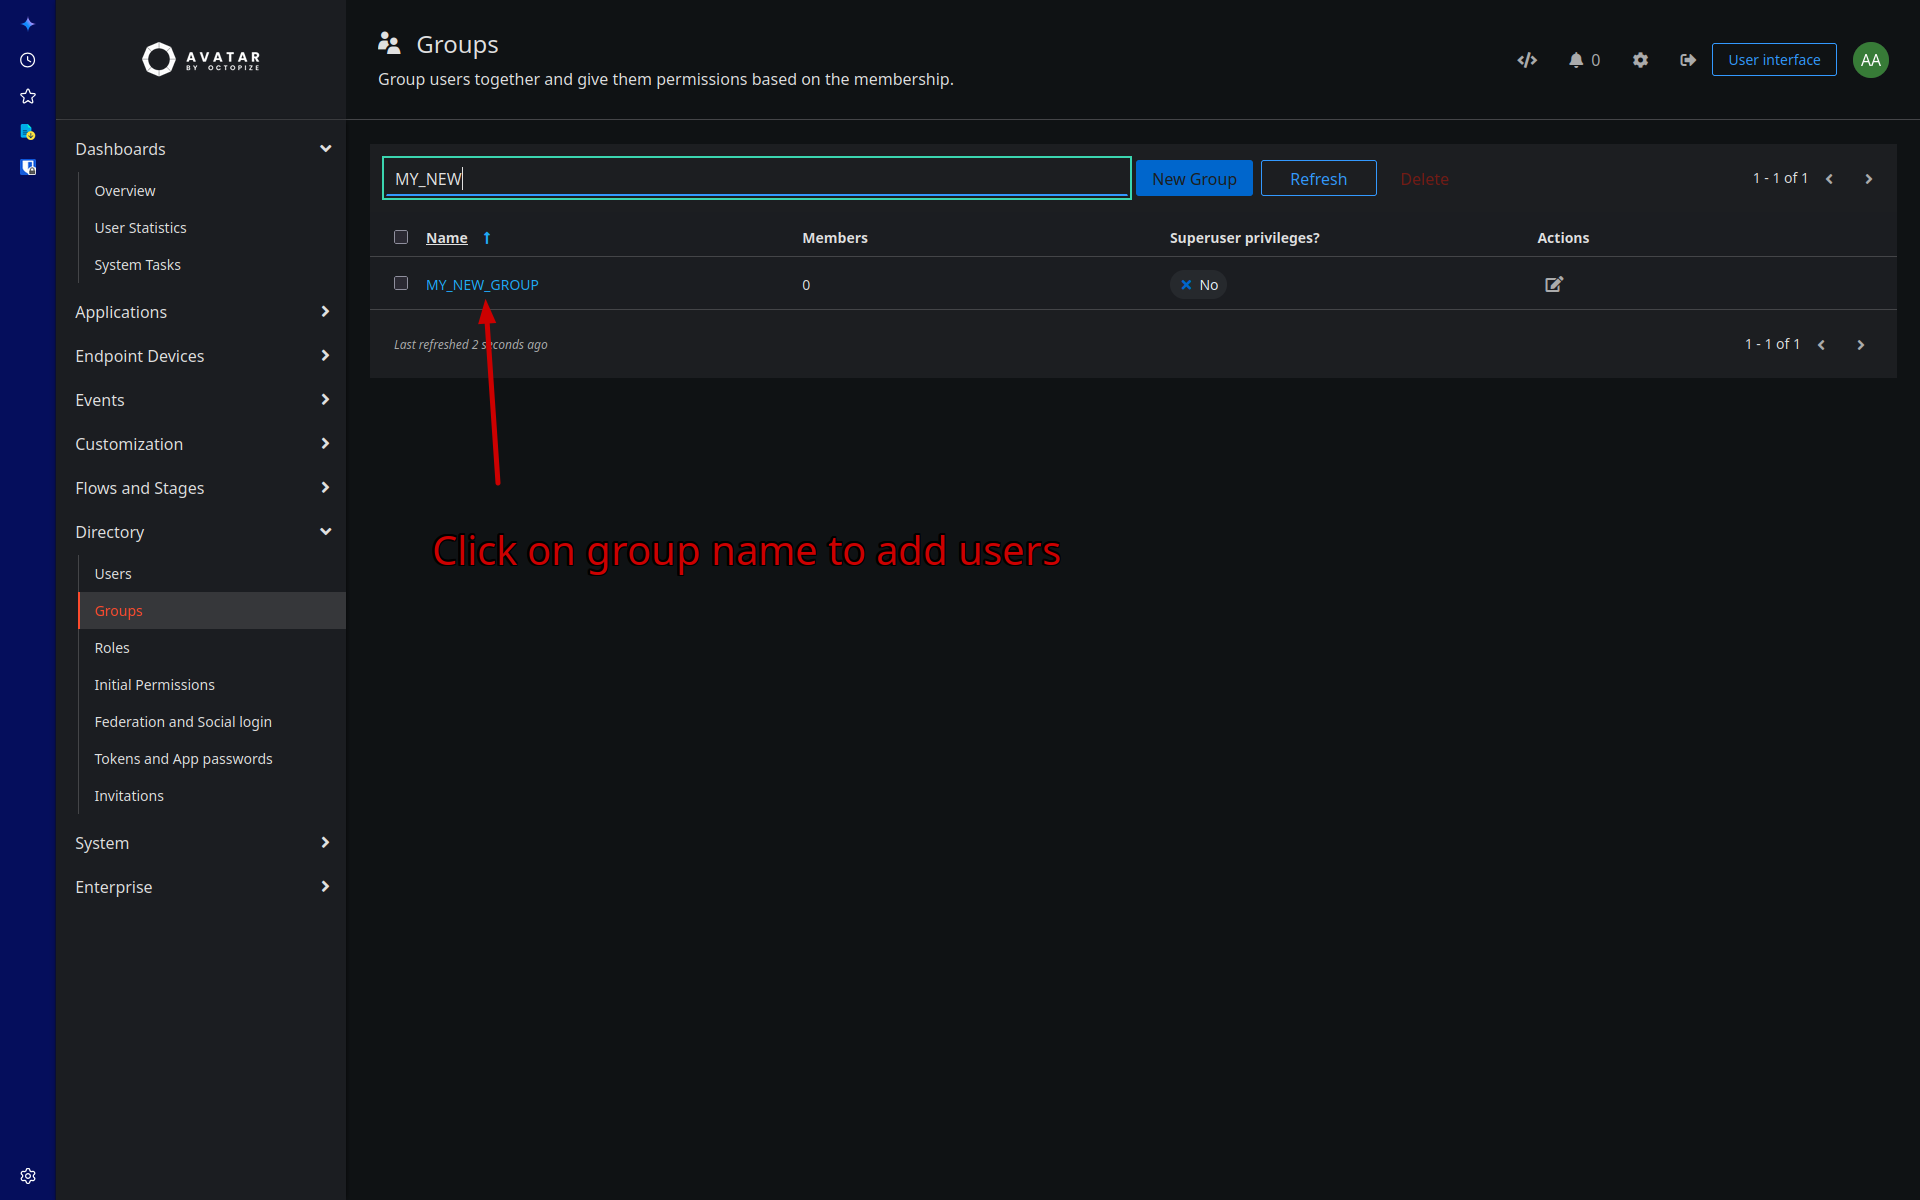
The group detail page will open. Click the Users tab at the top.
2.2 Add a new user
Inside the Users tab, click the Add new user dropdown button, then select New user….
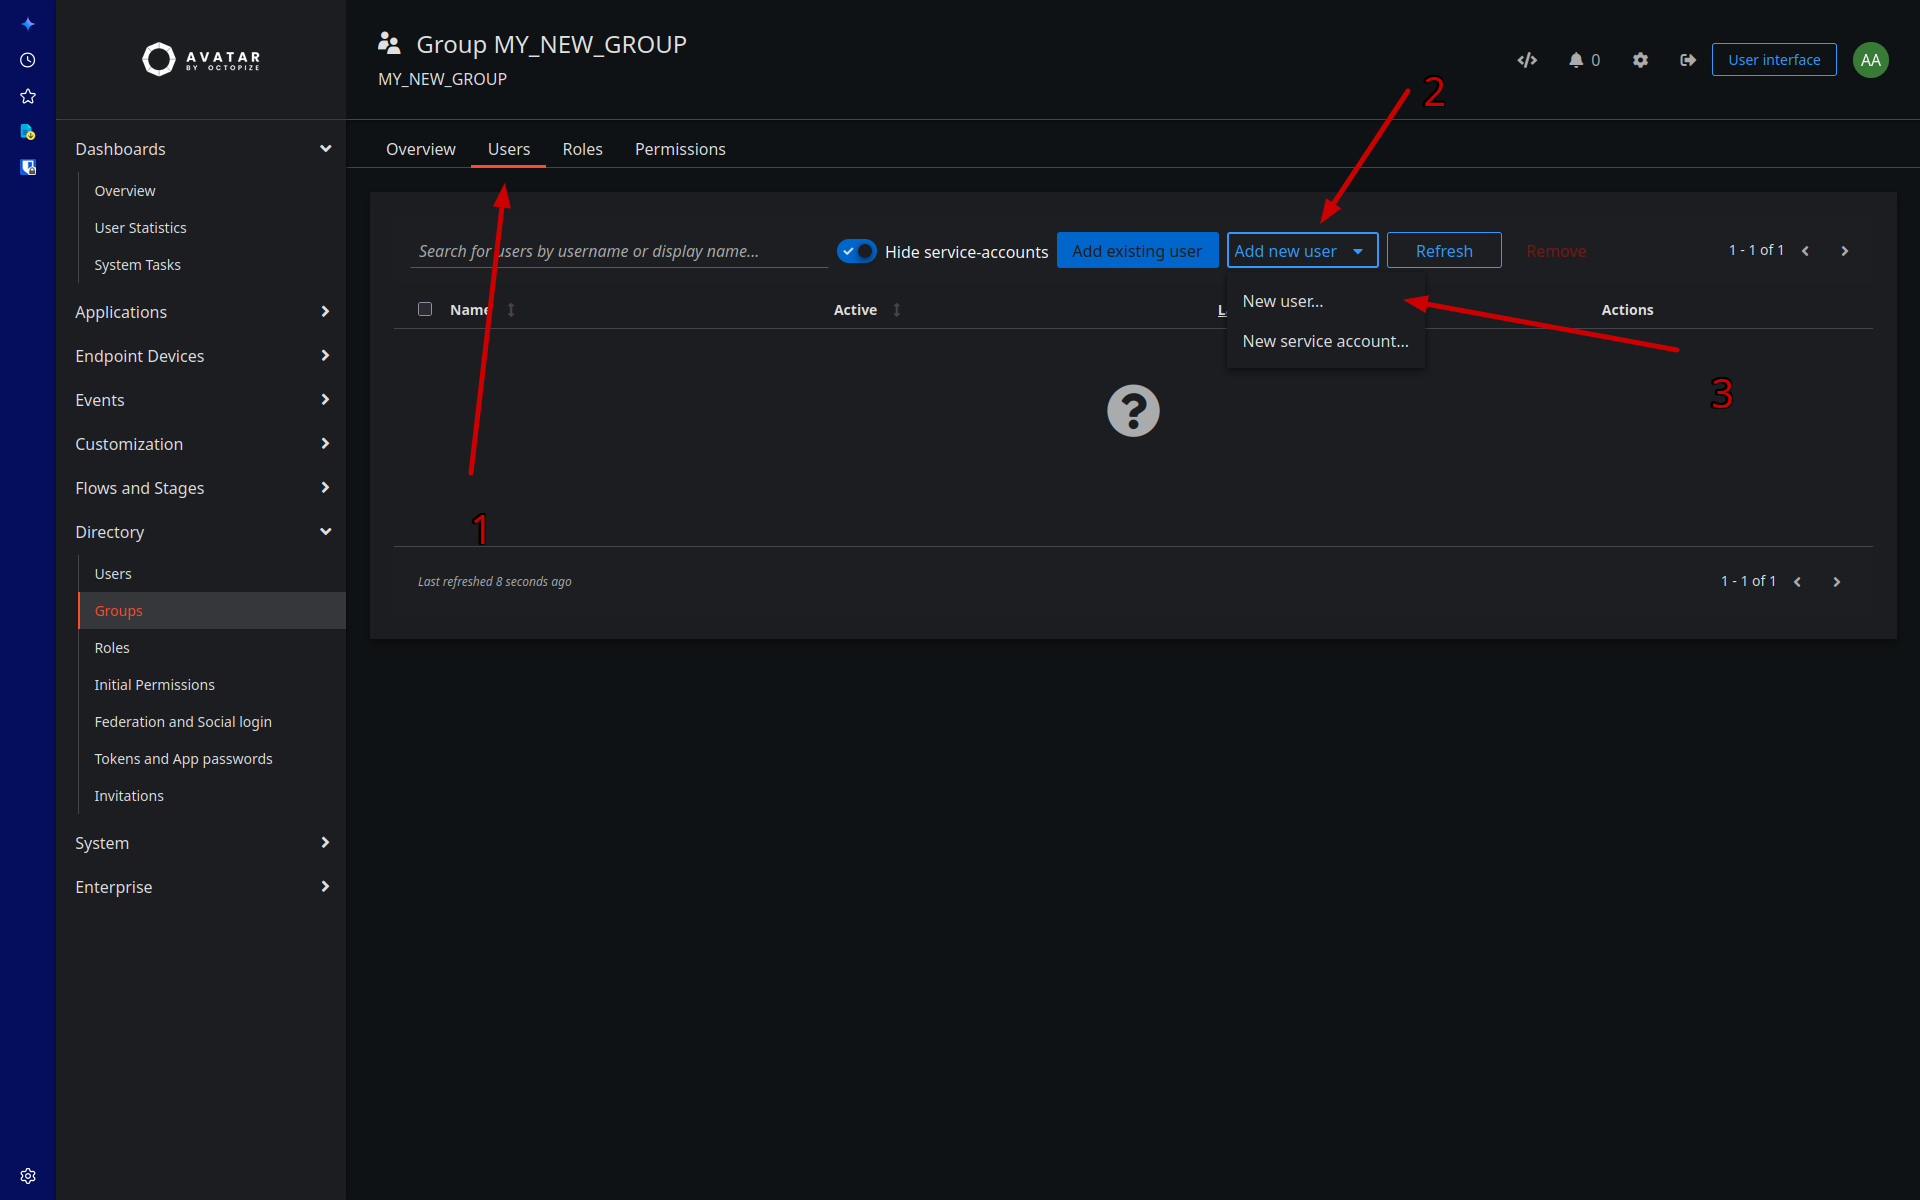
(1) You are now in the Users tab of the group. (2) Click the Add new user dropdown button. (3) Select New user… from the dropdown (not New service account…).
2.3 Fill in the New User form
The New User dialog will appear, pre-associated with the current group.
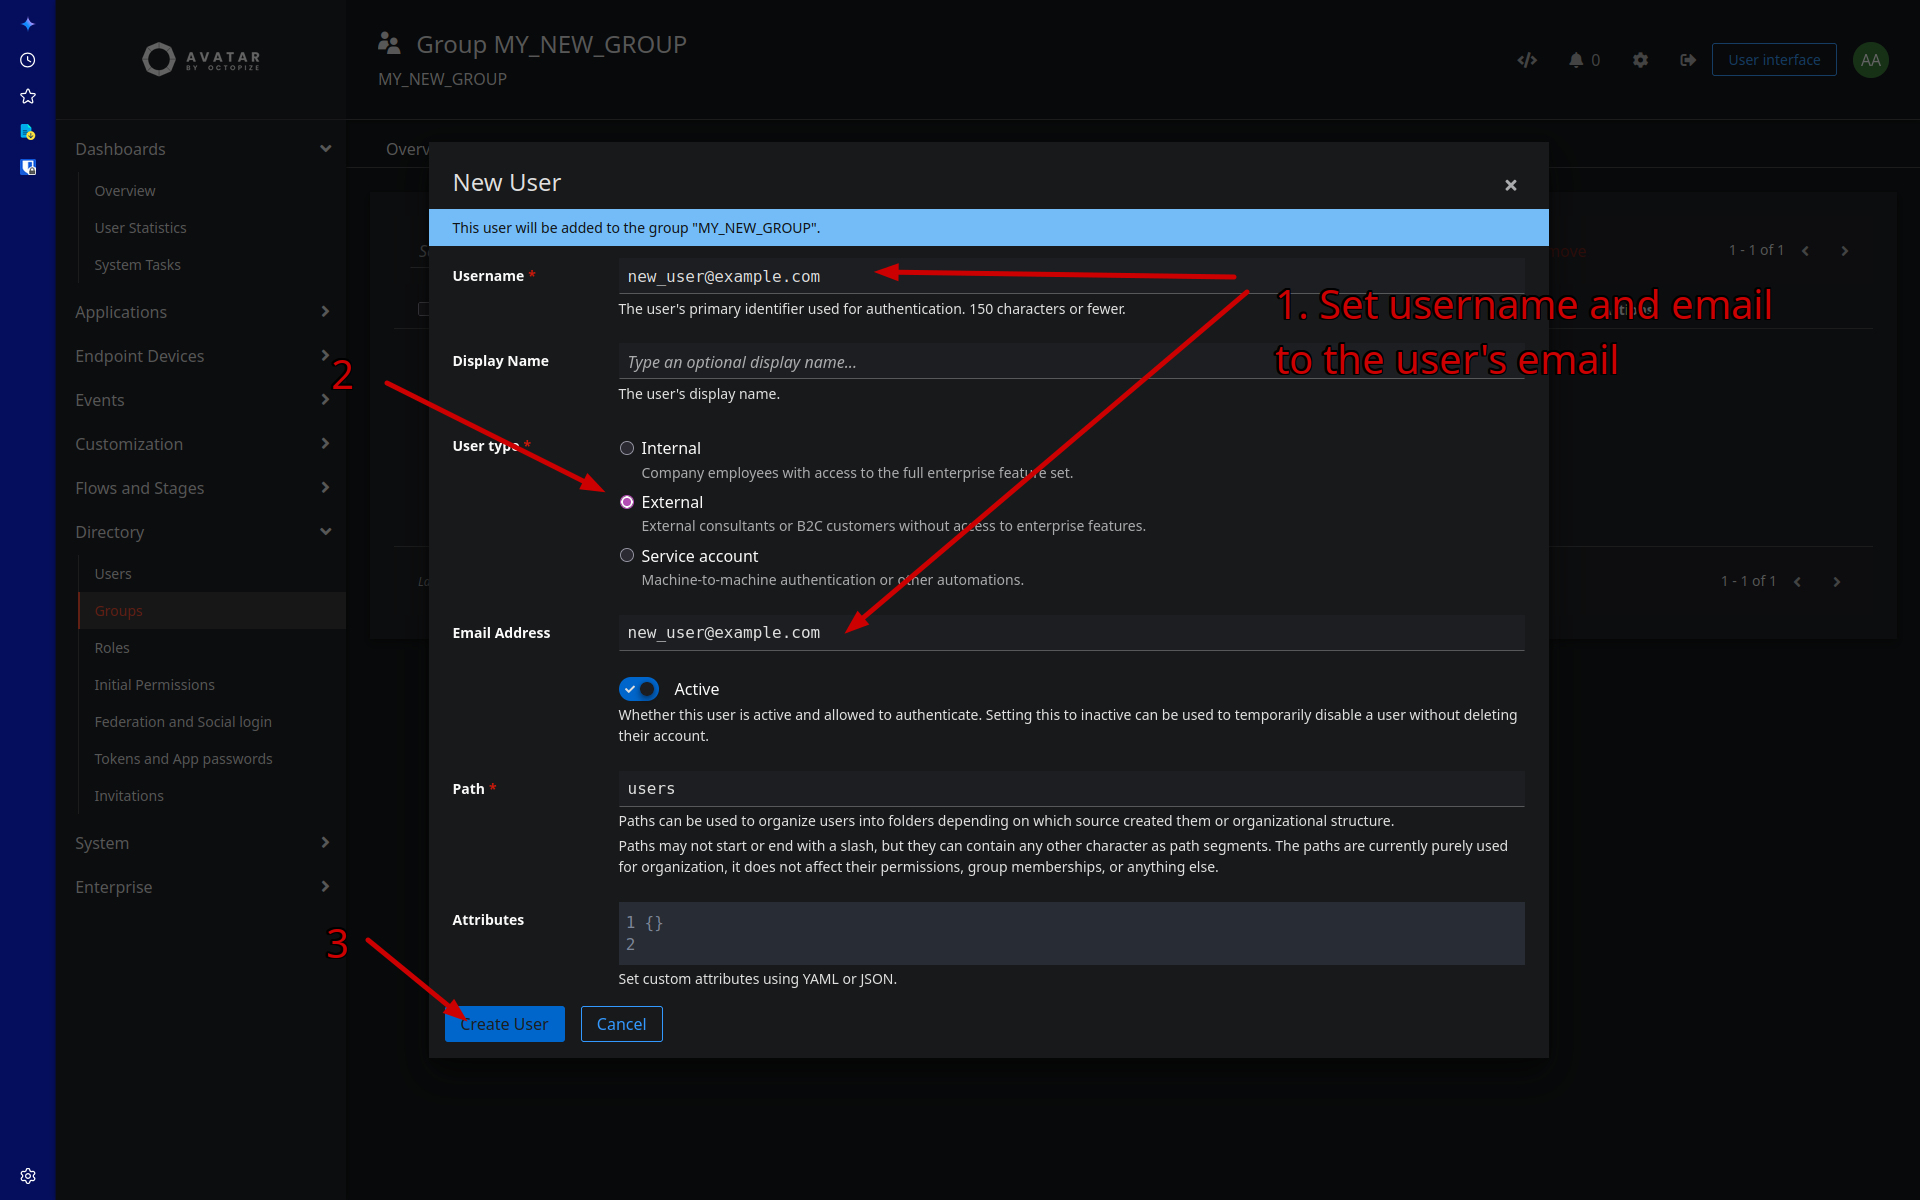
Fill in the fields as follows:
| Field | What to enter |
|---|---|
| Username | The user's email address (e.g. john@facebook.com). This is their primary login identifier. |
| Display Name | Optional — can be left blank or set to the user's full name. |
| User type | Select External for customers (B2C users without access to enterprise features). |
| Email Address | Same as the username — the user's email address. |
| Active | Leave enabled. |
| Path | Leave as users. |
| Attributes | Leave empty unless specific per-user attributes are needed. |
(1) Set both Username and Email Address to the user's email address. (2) Select the External user type. (3) Click Create User.
User types: Choose Internal only for Octopize employees with full enterprise access. External is the correct type for all customers and external collaborators. See the authentik user types docs for more detail.
2.4 Confirm user creation
After clicking Create User, you will be redirected back to the group's Users tab. The new user will appear in the list with Active: Yes, and a confirmation toast will appear at the bottom of the screen.
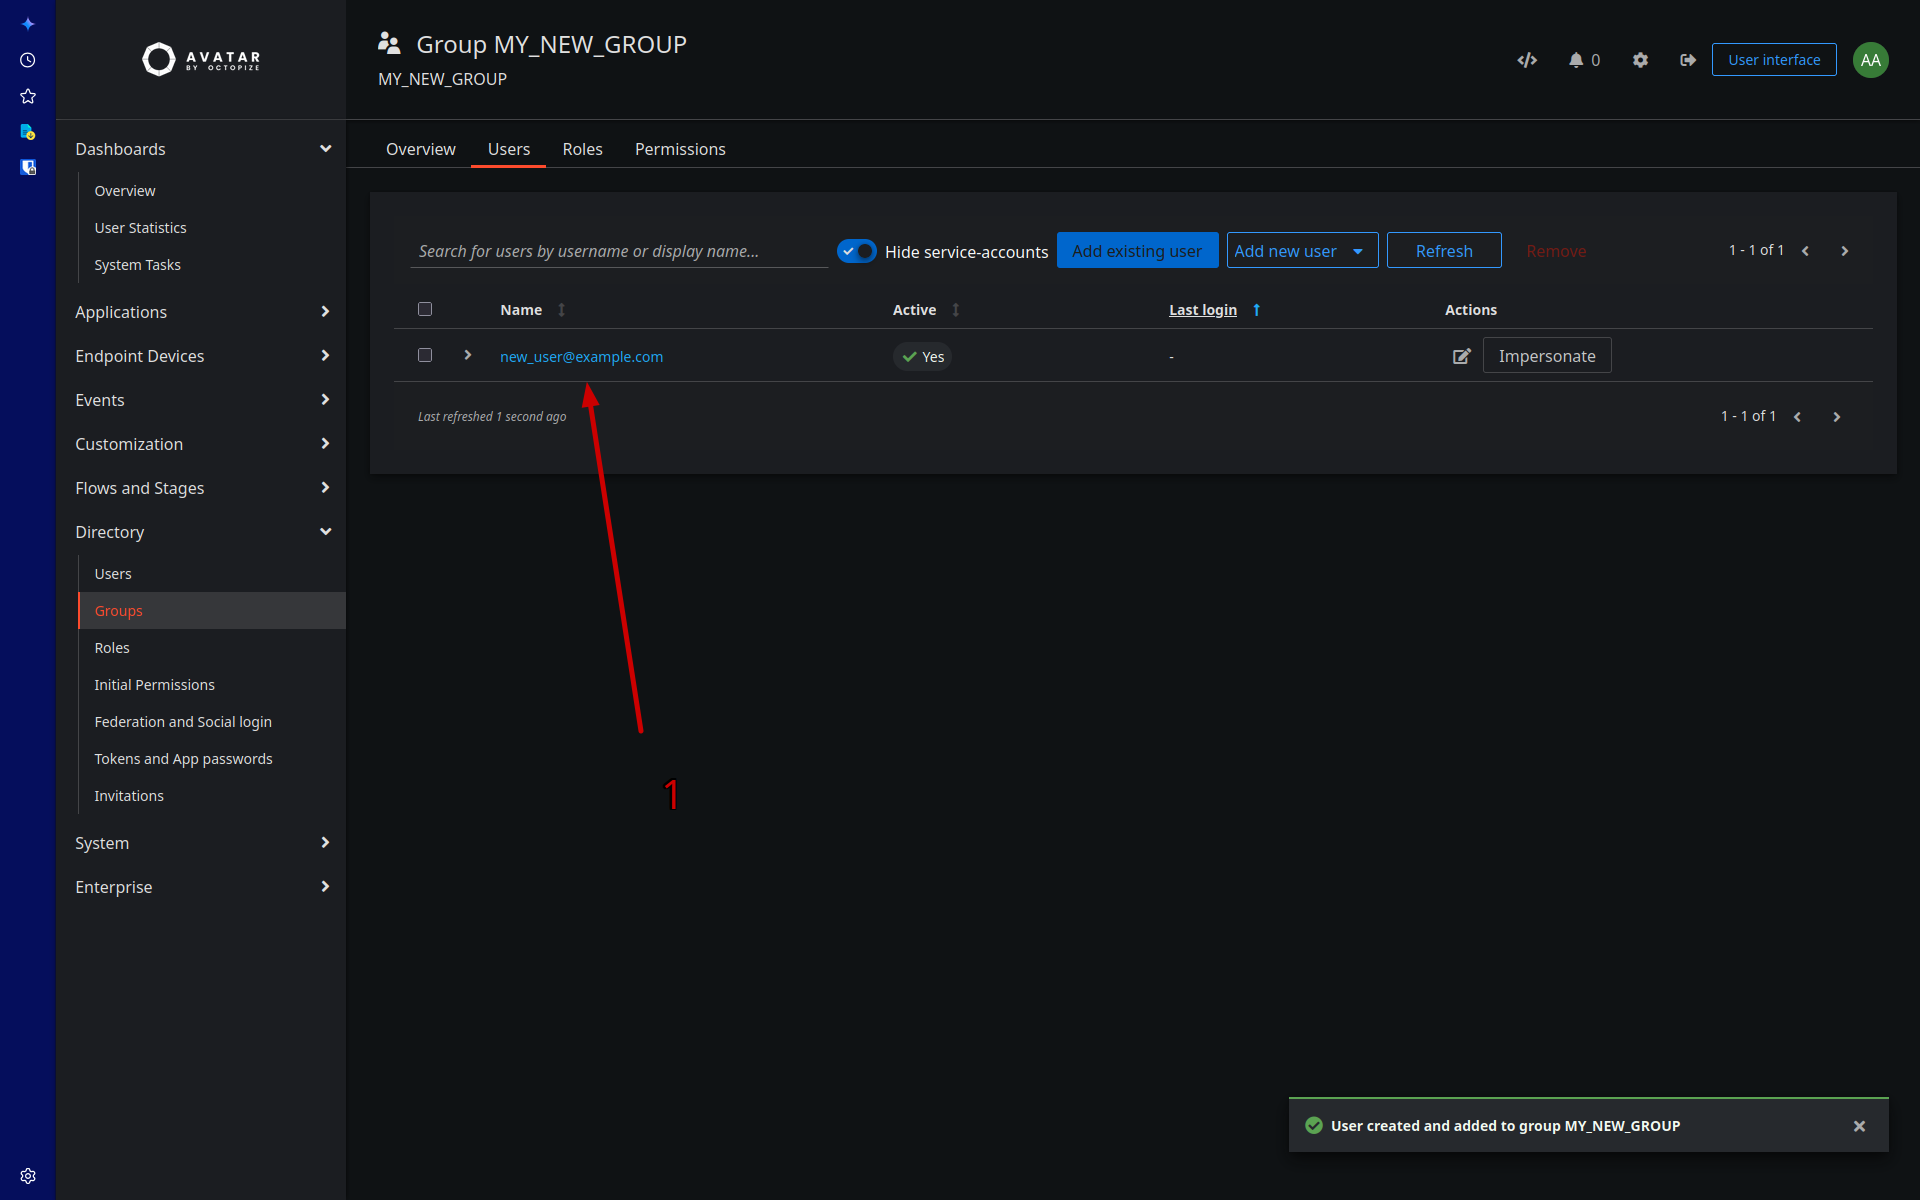
(1) The user new_user@example.com is now listed as a member of the group and is active.
3. Sending the welcome email
The user has been created without a password. You must send them a recovery link so they can set their own password and log in for the first time.
3.1 Open the user's profile
Click on the username in the group's Users list to navigate to their profile page.
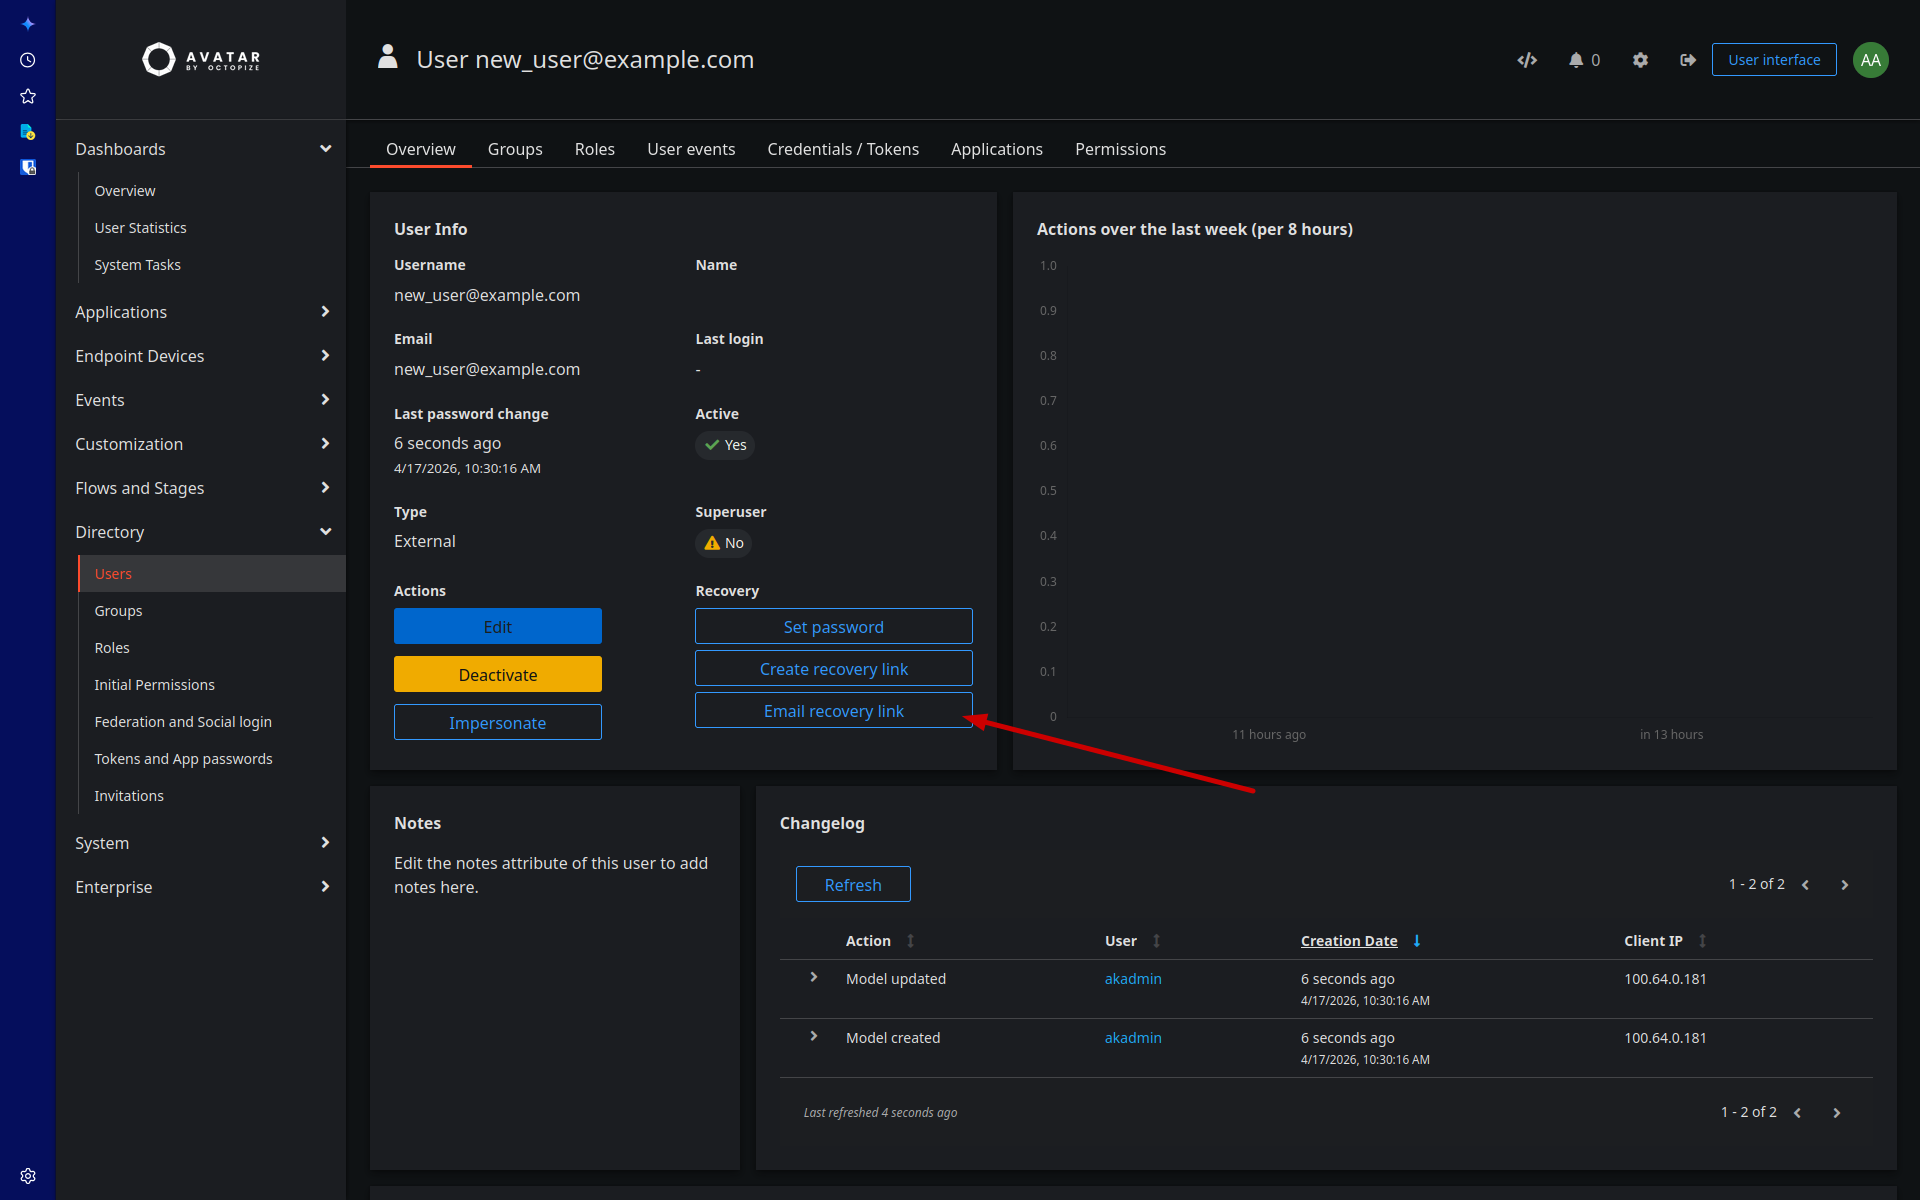
On the Overview tab of the user profile, locate the Recovery section in the top-right of the User Info card, and click Email recovery link.
3.2 Select the email stage
A Send recovery link to user dialog will appear. Click the Email stage dropdown and
select avatar-recovery-email.
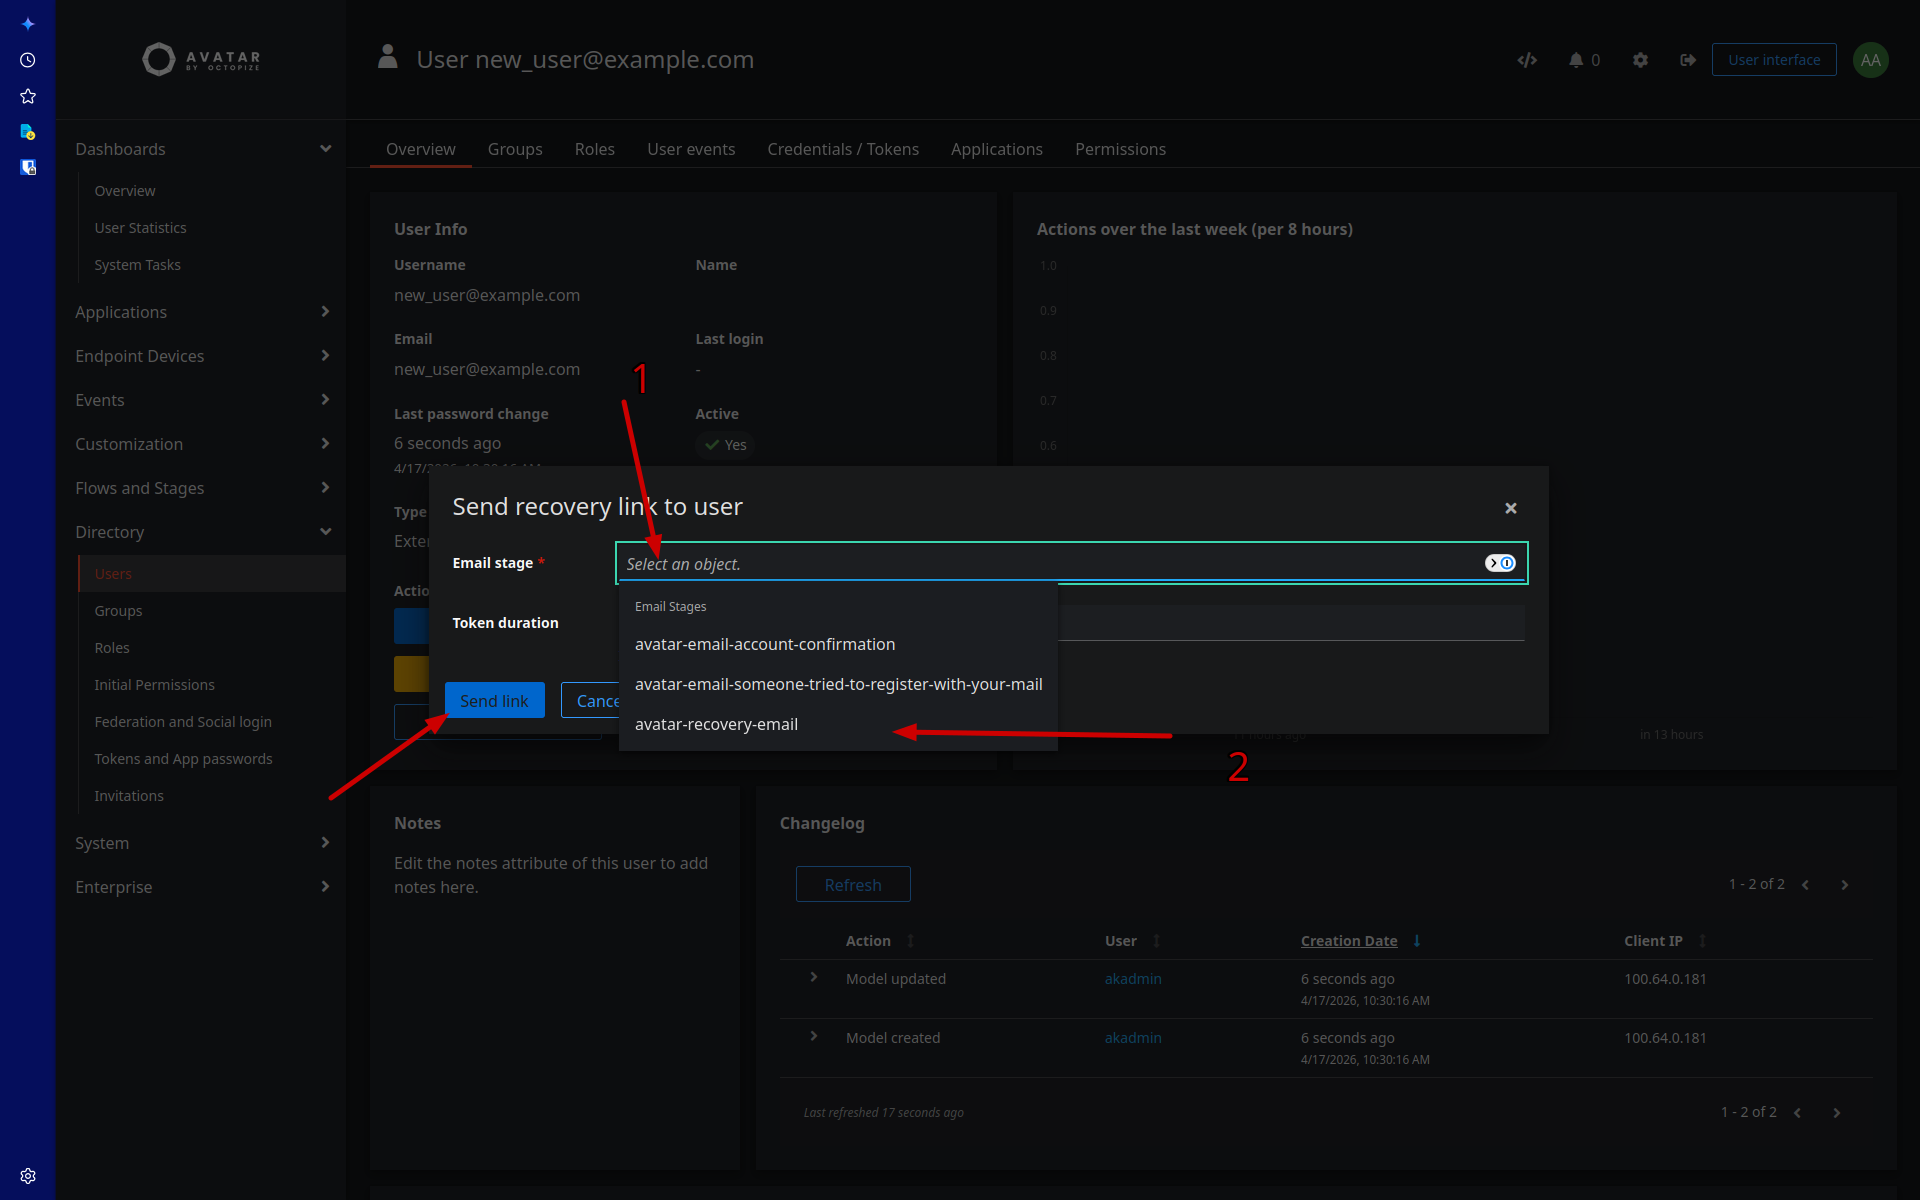
(1) Click the Email stage field.
(2) Select avatar-recovery-email from the list of available email stages.
The
avatar-recovery-emailstage uses the branded Avatar email template. Do not selectavatar-email-account-confirmationor other stages for this purpose.
3.3 Set the token duration and send
After selecting the email stage, review the Token duration (default: days=7). Adjust if
necessary, then click Send link.
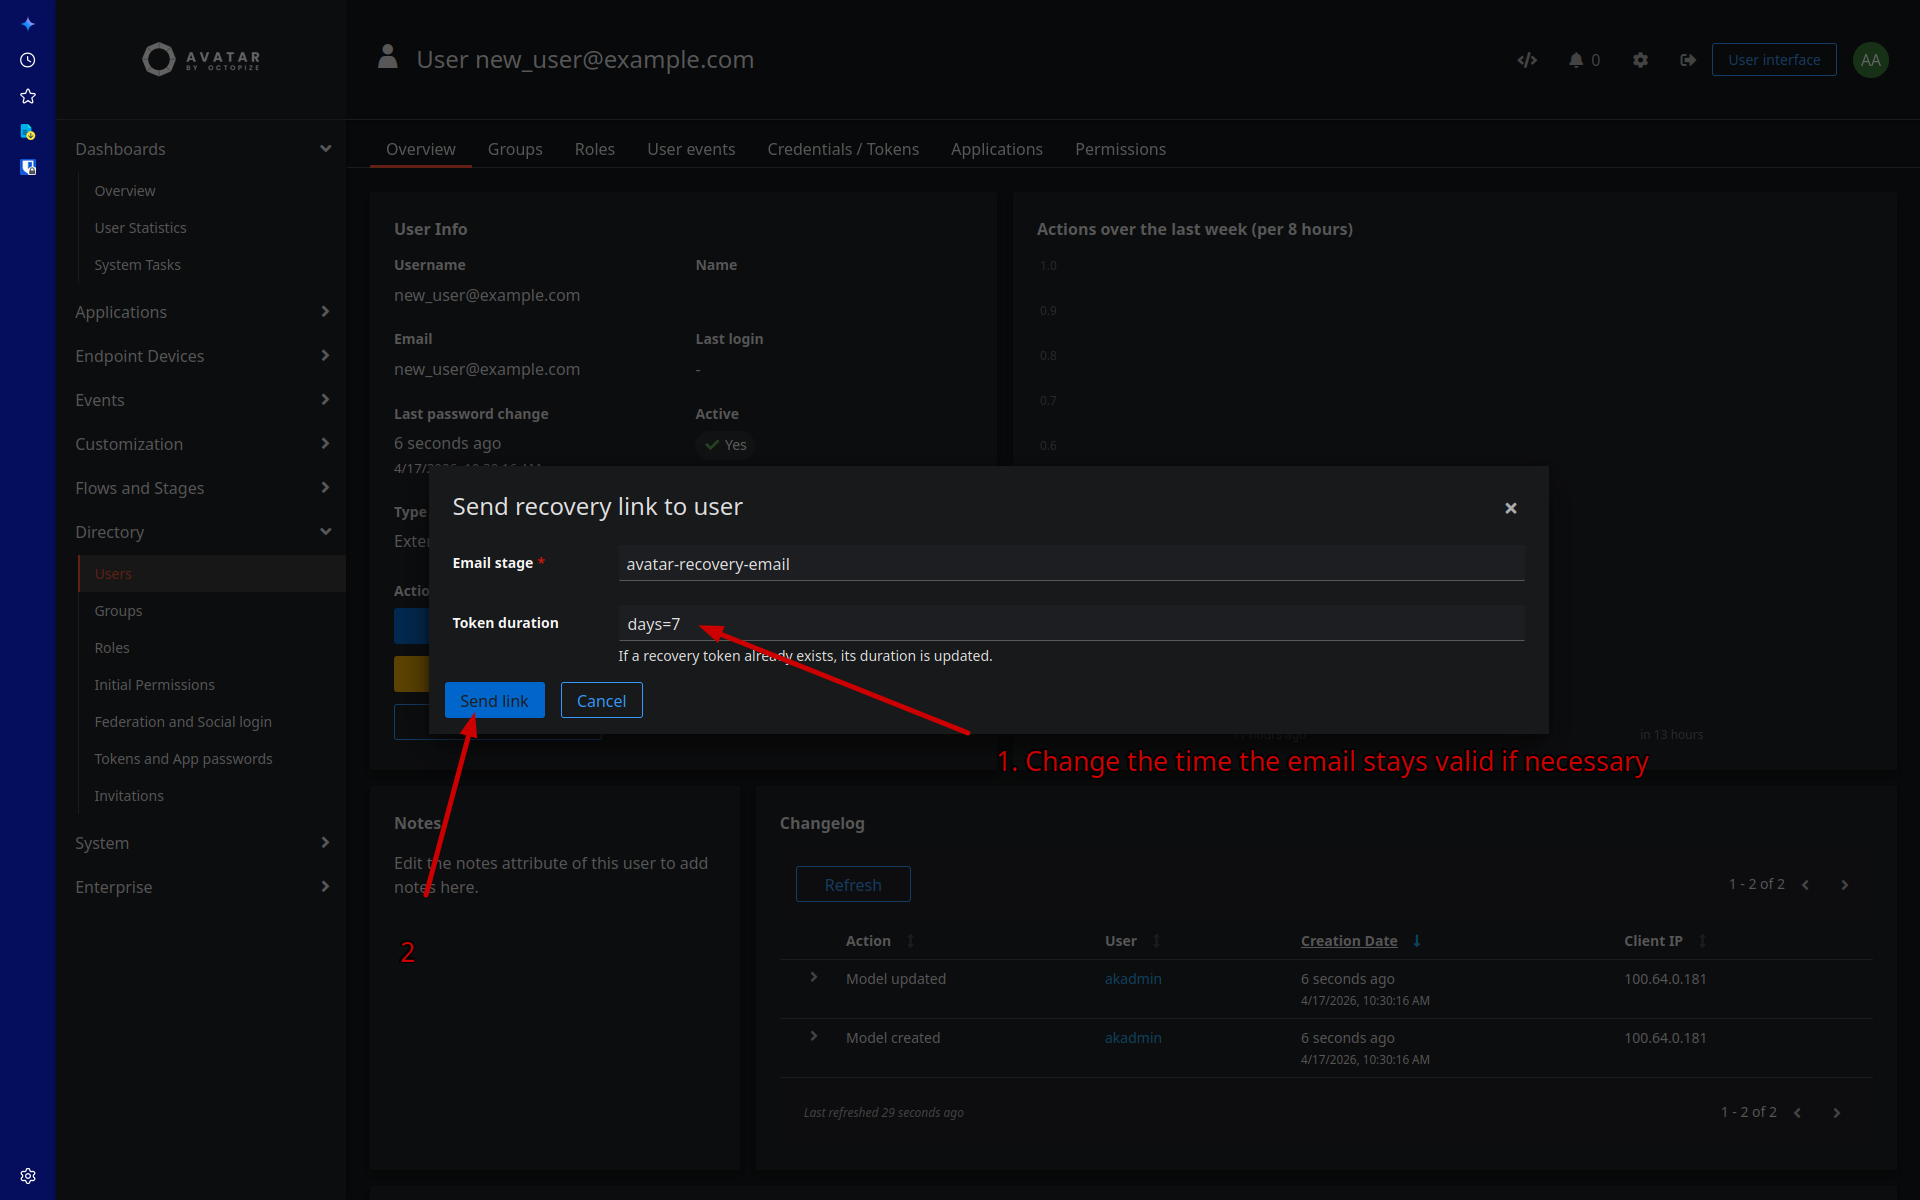
(1) Optionally adjust the Token duration — days=7 is the standard validity window.
(2) Click Send link.
The user will receive an email with a link that lets them set their password. The link is valid for the duration specified.
Summary
| Step | Action | Location |
|---|---|---|
| 1 | Navigate to Directory → Groups | Sidebar |
| 2 | Click New Group, set name (email domain) + license attribute | Groups page |
| 3 | Click the group name, go to Users tab | Group detail |
| 4 | Add new user → New user…, fill in email + select External | Group Users tab |
| 5 | On the user's profile, click Email recovery link | User Overview |
| 6 | Select avatar-recovery-email, set duration, click Send link | Recovery dialog |
Further reading
Recovering admin access
If you lost the akadmin password and no other admin account exists, generate a one-time recovery
link from the Authentik worker:
# Docker, from generated_files/
docker compose exec authentik_worker ak create_recovery_key 1 akadmin

# Kubernetes (the deployment name is prefixed with the Helm release name)
kubectl -n avatar exec deploy/<authentik-worker-deployment> -- ak create_recovery_key 1 akadmin
It prints a URL, valid for one year here, that lets you set a new password for akadmin. See the
Authentik login recovery documentation.